Ask AI chatbot widget for Docusaurus
Add a Biel.ai AI chatbot or AI search widget to your Docusaurus v3 site using the docusaurus-biel plugin.
Prerequisites
- A Biel.ai account.
- A project with indexed content.
- A Docusaurus v3 site.
- Node.js installed.
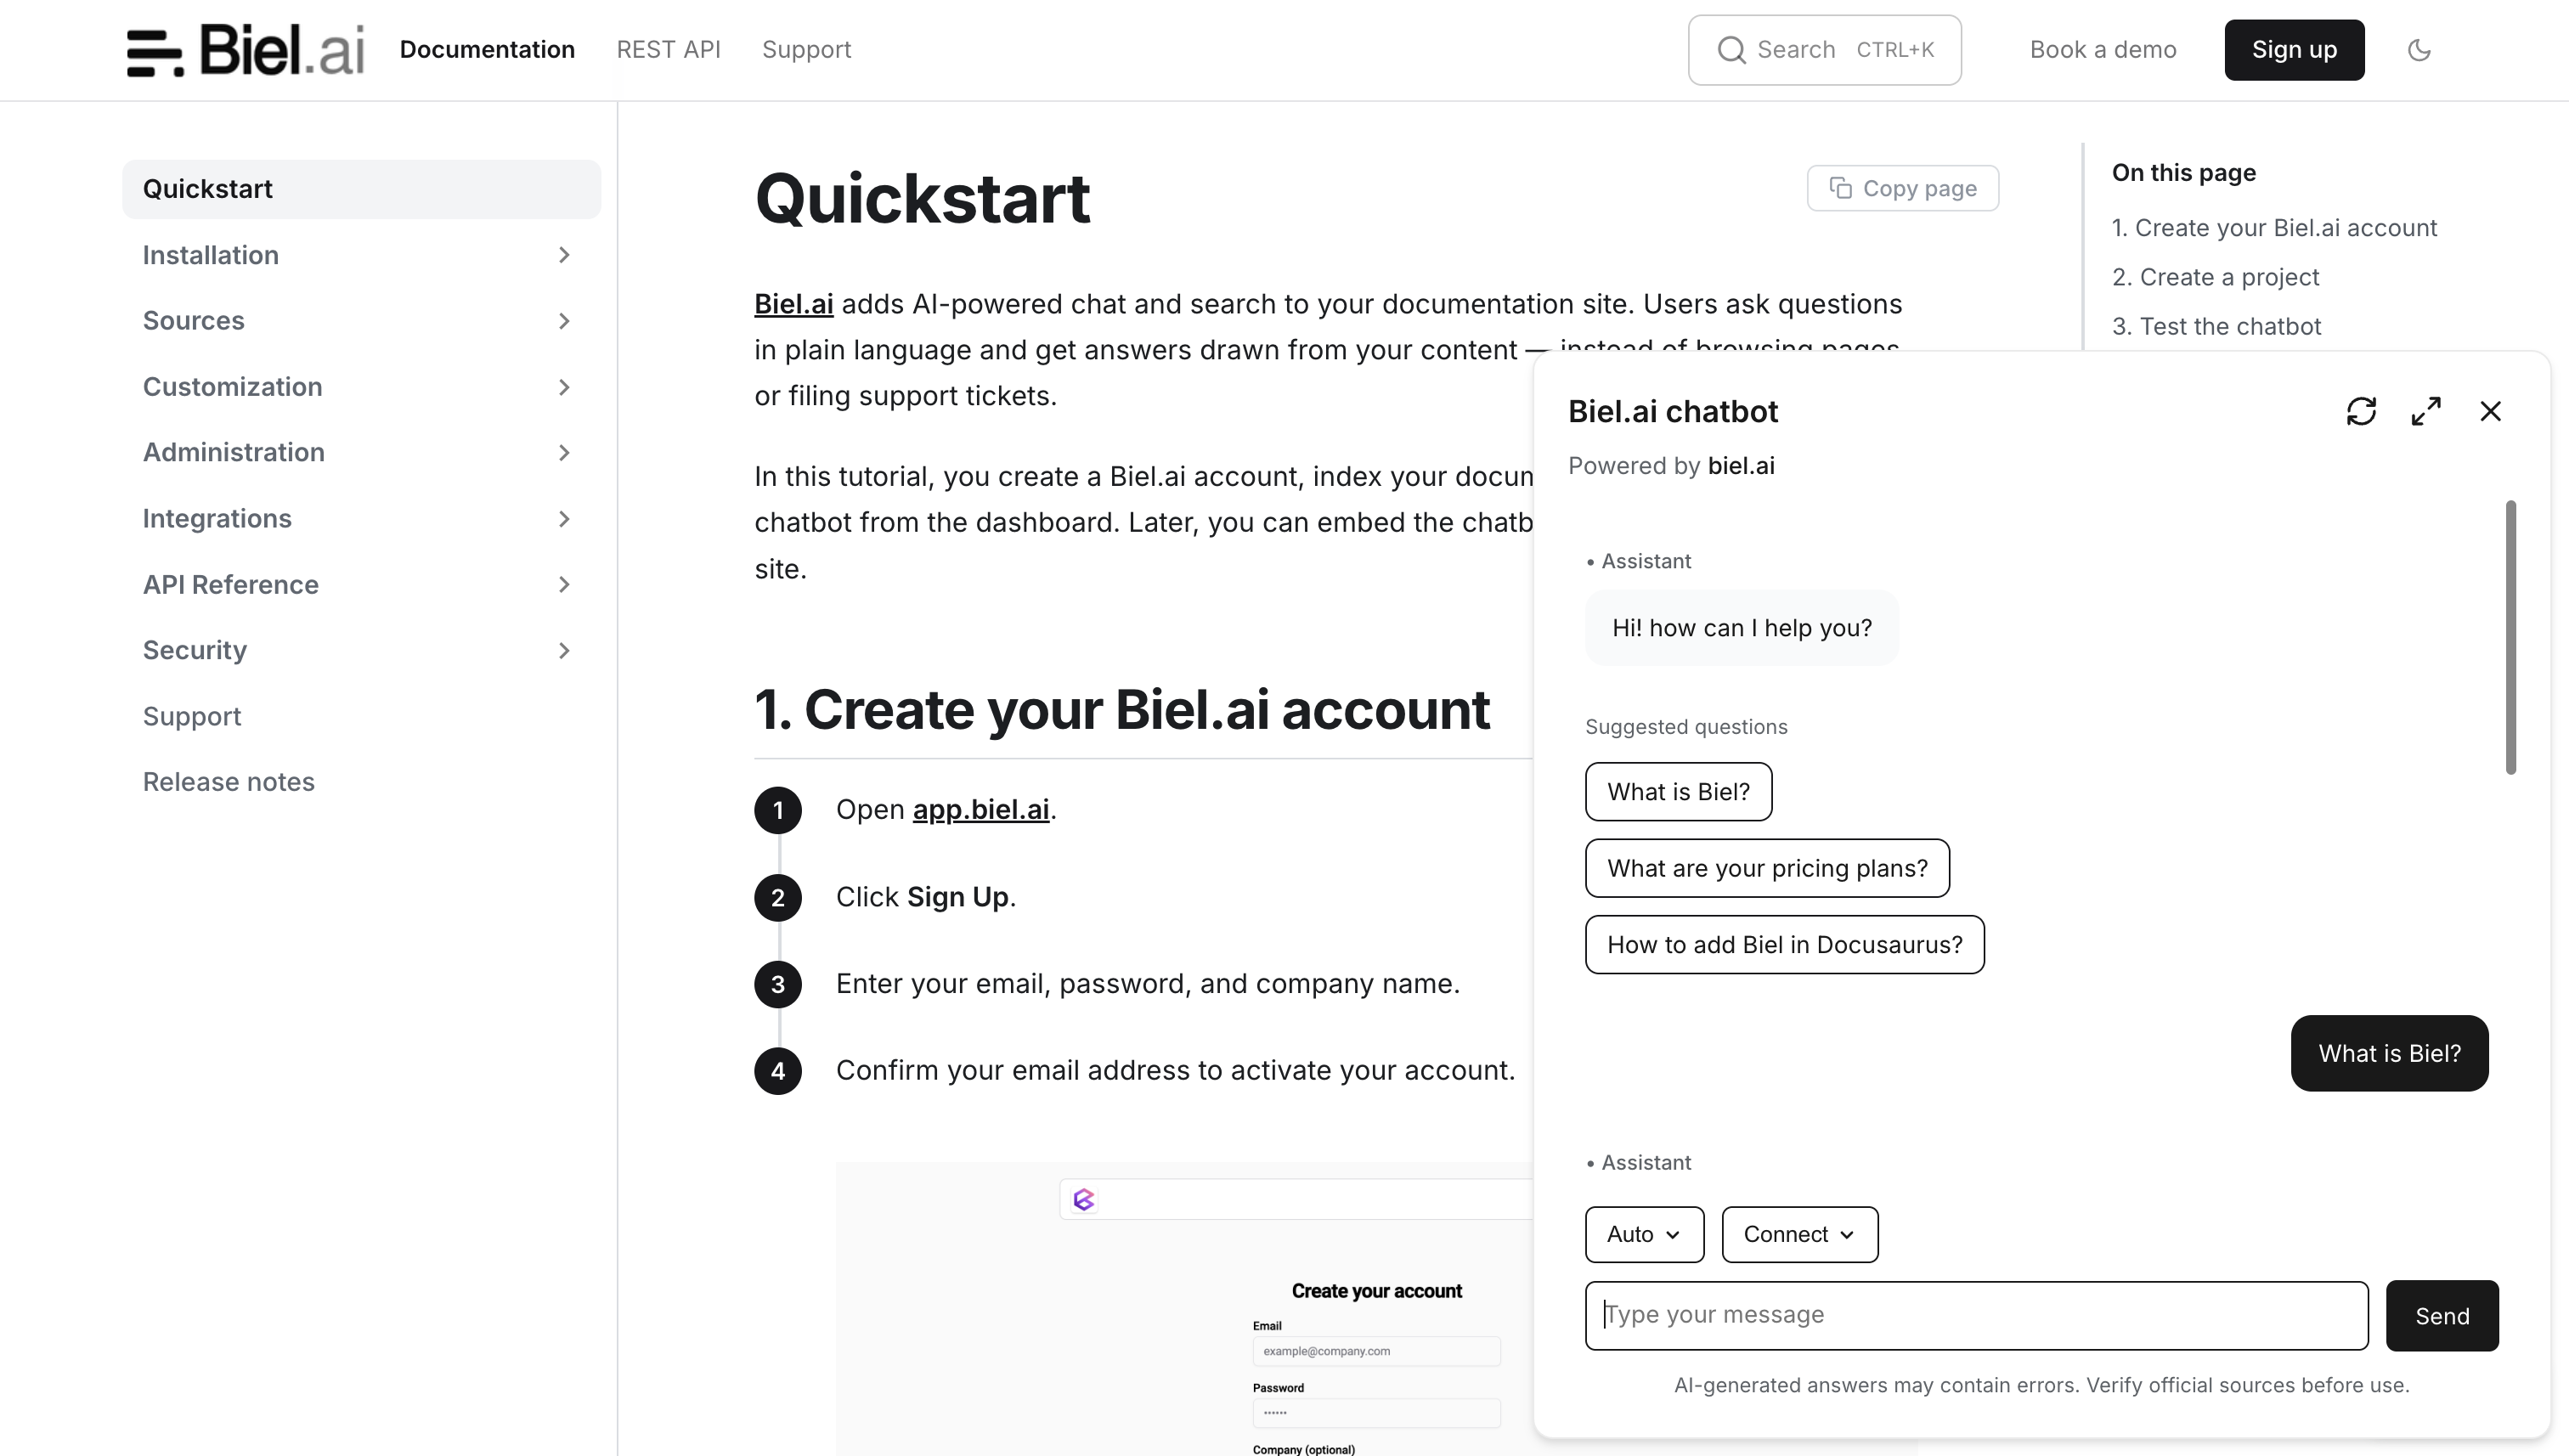
Add the chatbot widget
The docusaurus-biel plugin adds a floating chat button to your site.
-
Install the plugin:
npm install docusaurus-biel -
Add the plugin to
docusaurus.config.js:plugins: [
[
'docusaurus-biel',{
project: '<YOUR_PROJECT_ID>',
headerTitle: 'Biel.ai chatbot',
version: 'latest'
}
]
],Replace
<YOUR_PROJECT_ID>with your project's ID from the Biel.ai dashboard. -
Run
npm startand verify the chatbot appears on your site.
Customization
Pass layout options to the plugin as camelCase properties:
plugins: [
    [
        'docusaurus-biel',{
            enable: true,
            project: '<YOUR_PROJECT_ID>',
            bielButtonText: 'ASK AI',
            buttonPosition: 'center-right',
            modalPosition: 'sidebar-right',
            headerTitle: 'Biel.ai chatbot',
            buttonStyle: 'dark',
        }
    ]
],
To override the widget's styles (colors, fonts, etc.), add CSS custom properties to your src/css/custom.css file:
:root {
    --biel-primary-color: #FF0000;
}
See Styles for the full list of CSS properties.
Make sure custom.css is referenced in docusaurus.config.js under the classic preset:
presets: [
    [
        'classic',
        {
            theme: {
                customCss: require.resolve('./src/css/custom.css'),
            },
        },
    ],
],
Add the search widget
The search widget replaces the default Docusaurus search bar with Biel.ai's AI-powered search.

-
Install the plugin:
npm install docusaurus-biel -
Eject the
SearchBarcomponent using swizzling:npm run swizzle @docusaurus/theme-classic SearchBarWhen prompted, choose TypeScript and Eject.
-
Open
src/theme/SearchBar.tsxand replace its content with:import React from 'react';
export default function SearchBar() {
const projectId = '<PROJECT_ID>';
const headerTitle = 'Documentation chatbot';
// @ts-ignore: Not a React component
return <biel-search-button project={projectId} button-style="rounded" header-title={headerTitle}>Search</biel-search-button>;
}Replace
<PROJECT_ID>with your project's ID from the Biel.ai dashboard. -
Run
npm startand verify the search widget appears in the navbar.
Set enable: false in the docusaurus-biel plugin config to hide the floating chat button:
plugins: [
    [
        'docusaurus-biel', {
            enable: false,
            project: '<YOUR_PROJECT_ID>',
            headerTitle: 'Biel.ai chatbot',
            version: 'latest'
        }
    ]
],
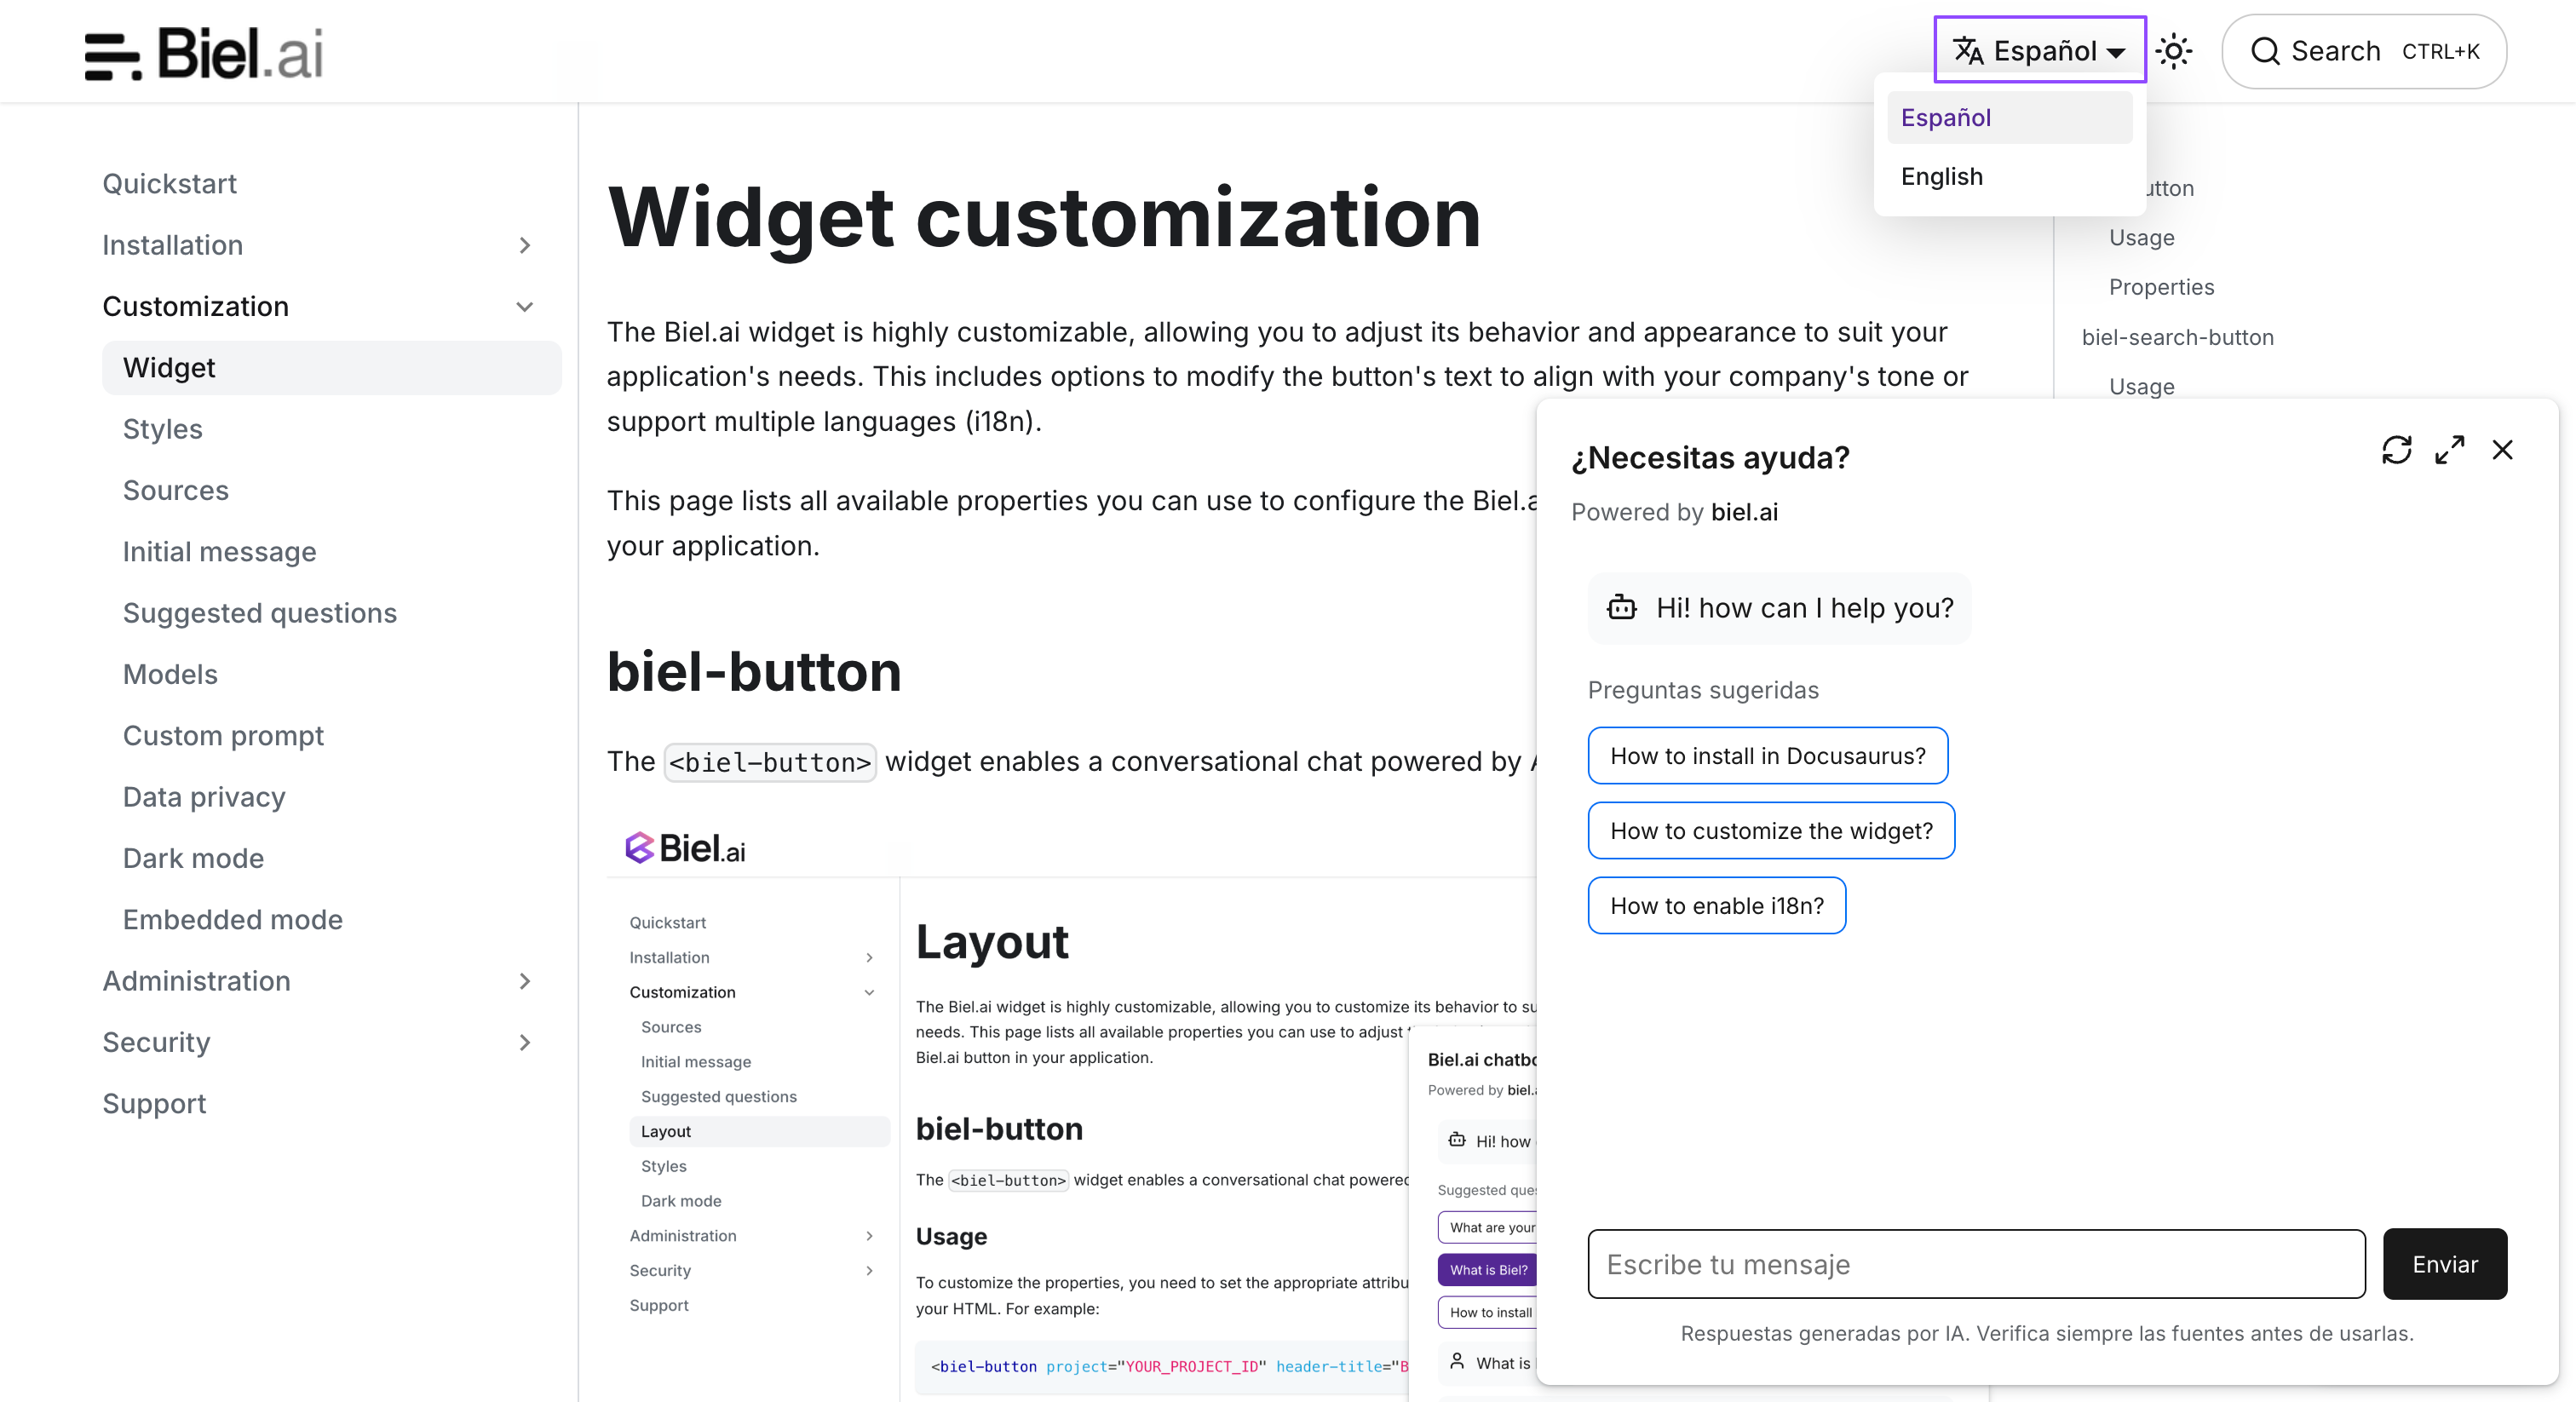
Multilingual support
If your Docusaurus site uses i18n, you can localize the chatbot's UI strings per locale. This approach uses biel-react instead of the docusaurus-biel plugin.
-
Install
biel-react:npm install biel-reactAlready using docusaurus-biel?This setup replaces it. Run
npm uninstall docusaurus-bielto remove the plugin. -
Wrap the Footer component using swizzling to inject the chatbot before the closing body tag:
npm run swizzle @docusaurus/theme-classic FooterWhen prompted, choose Wrap.
-
Open
src/theme/Footer/index.jsand replace its content with:import React, { useEffect } from 'react';
import Footer from '@theme-original/Footer';
import useDocusaurusContext from '@docusaurus/useDocusaurusContext';
import { BielButton } from 'biel-react';
import { defineCustomElements } from 'biel-search/loader';
import 'biel-search/dist/biel-search/biel-search.css';
function BielWidget() {
const { i18n } = useDocusaurusContext();
const language = i18n.currentLocale;
const projectId = '<PROJECT_ID>'; // Replace with your actual project ID
const placeholders = {
en: {
bielButtonText: "Ask AI",
sendButtonText: 'Send',
inputPlaceholderText: 'Type your message',
error403: 'Oops! The request URL does not match the one defined for this project.',
error404: 'Oops! We could not find the provided project ID.',
errorDefault: 'Oops! Please try again later.',
headerTitle: 'Need help?',
footerText: 'AI generated answers. Always verify the sources before using them.',
sourcesText: 'Sources',
suggestedQuestions: "['What is Biel.ai?', 'How to install in Docusaurus?']",
suggestedQuestionsTitle: 'Suggested questions',
termsTitle: 'Chatbot Terms & Conditions',
termsDescription: "Please review our <a href='https://biel.ai/terms' target='_blank' rel='noopener'>Terms & Conditions</a> before proceeding.",
termsCheckboxText: 'I have read and agree to the Terms & Conditions.',
welcomeMessage: 'Hello! How can I help you today?'
},
es: {
bielButtonText: "Pregúntame",
sendButtonText: 'Enviar',
inputPlaceholderText: 'Escribe tu mensaje',
error403: '¡Ups! La URL de solicitud no coincide con la definida para este proyecto.',
error404: '¡Ups! No pudimos encontrar el ID de proyecto proporcionado.',
errorDefault: '¡Ups! Por favor, intenta de nuevo más tarde.',
headerTitle: '¿Necesitas ayuda?',
footerText: 'Respuestas generadas por IA. Verifica siempre las fuentes antes de usarlas.',
sourcesText: 'Fuentes',
suggestedQuestions: "['¿Qué es Biel.ai', '¿Cómo instalar en Docusaurus?']",
suggestedQuestionsTitle: 'Preguntas sugeridas',
termsTitle: 'Términos y condiciones del chatbot',
termsDescription: "Por favor revisa nuestros <a href='https://biel.ai/terms' target='_blank' rel='noopener'>Términos y Condiciones</a> antes de continuar.",
termsCheckboxText: 'He leído y acepto los Términos y Condiciones.',
welcomeMessage: '¡Hola! ¿En qué puedo ayudarte hoy?'
}
};
const {
bielButtonText,
error403,
error404,
errorDefault,
footerText,
headerTitle,
inputPlaceholderText,
sendButtonText,
sourcesText,
suggestedQuestions,
suggestedQuestionsTitle,
termsCheckboxText,
termsDescription,
termsTitle,
welcomeMessage,
} = placeholders[language] || placeholders.en;
useEffect(() => {
if (typeof window !== 'undefined') {
defineCustomElements(window);
}
}, []);
return (
<div className="biel-widget">
<BielButton
project={projectId}
button-position="bottom-right"
button-style="dark"
modal-position="bottom-right"
error-message-4-0-3={error403}
error-message-4-0-4={error404}
error-message-default={errorDefault}
footer-text={footerText}
header-title={headerTitle}
input-placeholder-text={inputPlaceholderText}
send-button-text={sendButtonText}
sources-text={sourcesText}
suggested-questions={suggestedQuestions}
suggested-questions-title={suggestedQuestionsTitle}
terms-checkbox-text={termsCheckboxText}
terms-description={termsDescription}
terms-title={termsTitle}
welcome-message={welcomeMessage}
>
{bielButtonText}
</BielButton>
</div>
);
}
export default function FooterWrapper(props) {
return (
<>
<Footer {...props} />
<BielWidget />
</>
);
}Replace
<PROJECT_ID>with your project's ID from the Biel.ai dashboard. Update theplaceholdersobject with your supported languages. -
Run
npm startand verify the chatbot displays localized strings when you switch locales.
Next steps
- Customize the widget's appearance, behavior, and tone.
- Connect integrations like GitHub Actions, MCP, or Zapier.