Configure a custom domain
Use a subdomain such as ai.example.com for your team's widget connections, project API, and MCP. Each custom domain serves all projects in that team.
You need an active Business plan, the Administrator role, and access to your DNS provider. Choose an unused subdomain so you can keep your documentation site at its existing address.
Add the domain
- In app.biel.ai, open Team in the top navigation bar.
- In the Custom domains card, click Add domain.
- Enter your hostname, such as
ai.example.com, withouthttps://, a port, or a path. Click Add domain.
Configure DNS
Copy the records from DNS and HTTPS to your DNS provider. For ai.example.com, the initial records look like this:
| Type | Name | Value |
|---|---|---|
| TXT | _biel-verification.ai.example.com | The verification token shown in Biel.ai |
| CNAME | ai.example.com | The target shown in Biel.ai, such as customers.biel.ai |
If your provider appends example.com automatically, enter the relative names _biel-verification.ai and ai instead.
The CNAME must be visible in public DNS. Keep it unproxied and unflattened. If you use Cloudflare DNS, select DNS only for this record. Biel.ai handles HTTPS for the custom hostname.
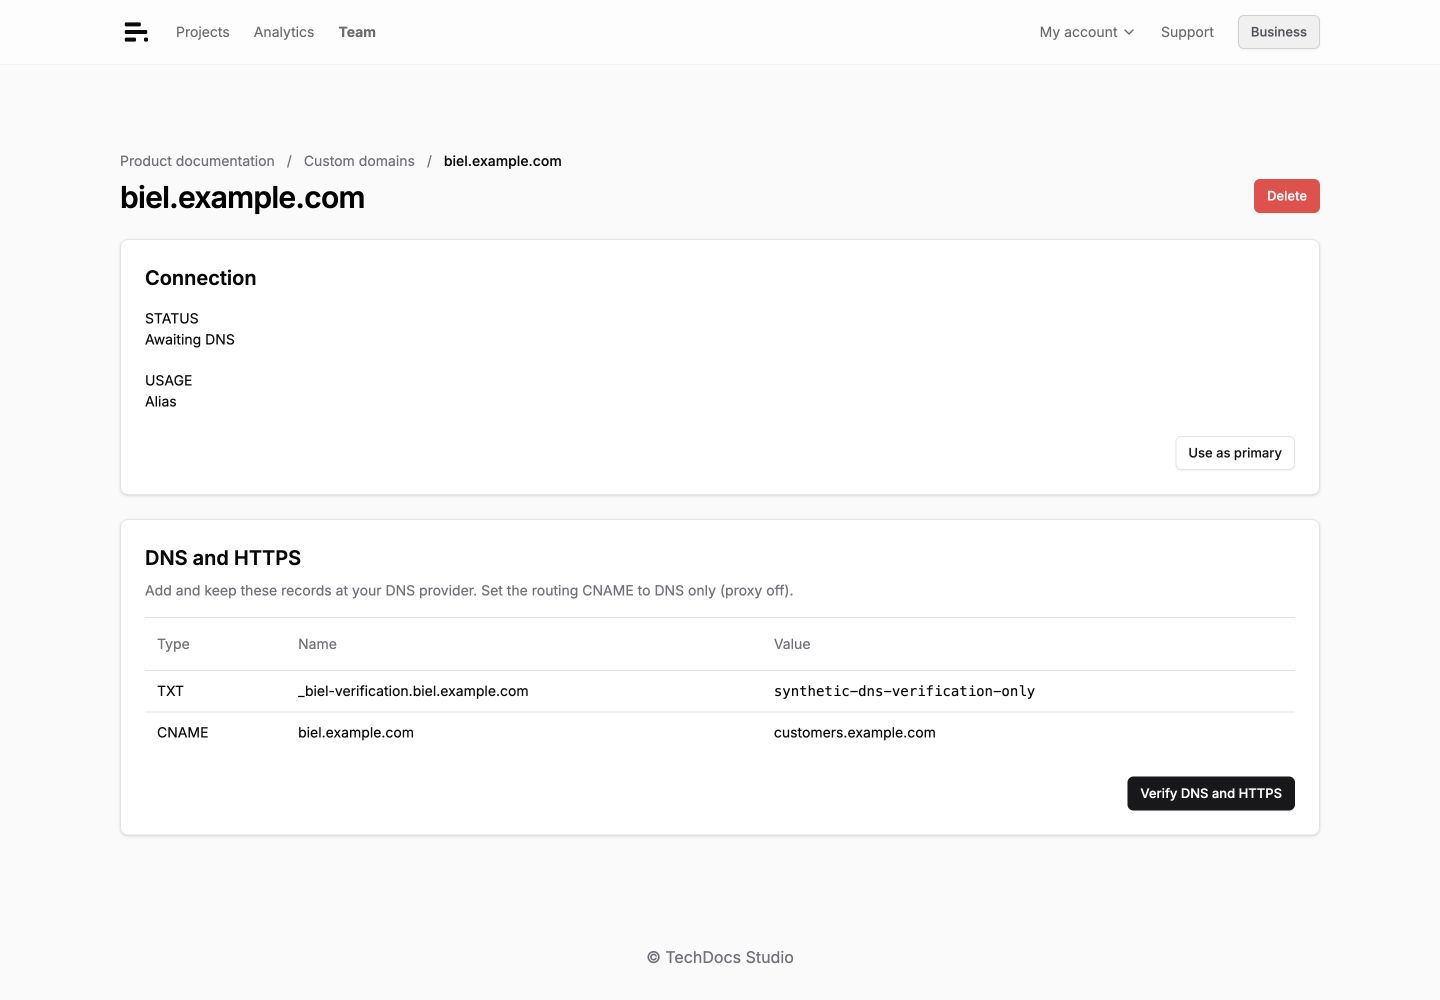
Verify DNS and HTTPS
- Return to the domain's page and click Verify DNS and HTTPS.
- Add any additional validation records that appear under DNS and HTTPS. These can include
_cf-custom-hostnameand_acme-challengerecords. Copy their exact names and values from Biel.ai. - Allow the DNS changes to propagate, then click Verify DNS and HTTPS again.
The domain is ready when its Status is Active. Both hostname verification and the HTTPS certificate must be ready. Keep the DNS records in place for ongoing verification.
Use the domain
Widget
The current widget automatically uses your team's primary active domain for search, chat, and Connect via MCP. You do not need to add api-url or mcp-server-url to your installation.
If your installation already sets either attribute, remove it to follow the primary domain, or keep it to use a specific endpoint. If you use an older widget release, update it first.
Project API and MCP
Use the custom origin for project API calls. For example, with a public project in this team:
curl https://ai.example.com/api/v2/projects/YOUR_PROJECT_ID/
Team-wide API calls and dashboard access keep using app.biel.ai.
For MCP clients, copy the MCP endpoint from your project's Settings > MCP. It uses the primary active domain. Keep the complete URL, including any access parameters. See MCP connection access.
Change the primary domain
A team can have up to two custom domains. The primary active domain is the default for widgets and project endpoints. To select another one, open its page and click Use as primary.
Current widgets without explicit URL overrides use the new primary domain when they load. Update API integrations and saved MCP client URLs manually.
Remove a domain
Update any widgets with explicit URLs, API integrations, and MCP clients using the hostname first. Then open Team > Custom domains, select the domain, click Delete, and confirm Delete domain.
Requests to that hostname stop working. After deletion, you can remove the DNS records you added for it. If removal reports a cleanup failure, the domain is disabled. Retry deletion from its page.
Troubleshooting
| Problem | What to check |
|---|---|
| Add domain is unavailable | Check your Business plan, Administrator role, and the limit of two domains. |
| DNS verification fails | Check the exact TXT token and CNAME target, DNS propagation, and whether the provider appended the zone name twice. Keep the CNAME DNS-only and unflattened. |
| HTTPS is still pending | Add all validation records displayed by Biel.ai, wait for propagation, and verify again. |
| An active domain stops working | Restore the required DNS records and active Business access, then verify again. |
| Requests return 403 or 404 | Use a project from the same team and a project API or MCP path. Check credentials, project access, MCP settings, and allowed domains. Opening the hostname alone does not open the dashboard. |